AutoRequests - How do I send people requests to complete a testimonial
Newsflash! Your customers aren't sitting around waiting to leave your business a review! While DirectoryTestimonial makes it easy to capture the testimonial, you still need to get them to your form. You of course can always create an email template inside your directory or site to send out when the time is right. But what if you could automate those requests inside DirectoryTestimonial?
Now you can! Automatically generate new testimonials on any platform by sending your customers review requests at the right time, and in the right way.
With DirectoryTestimonial you can generate testimonials on autopilot by sending automated review requests via email & SMS. Choose from our high converting, niche-based email & SMS templates or create your own.

PROCESS OVERVIEW
1. Import Your Contacts
Bring your customers into DirectoryTestimonial and manage them with our lightweight CRM. You can Import via CSV upload or integrations. Add custom attributes to track dynamic properties or events and sync with your other CRM or marketing software.
2. Edit Your Message Using Our Full-featured email & SMS message editor
Choose from a range of high-converting, niche-based message templates or build your own. Our powerful editor enables you to customize messages to your brand and insert dynamic customer data.
3. Monitor your campaign performance and test alternatives
AutoRequests includes a simple dashboard for viewing campaign data, including open & click rates and new reviews. Keep an eye on high-performing campaigns and tweak messaging to see what works best.
STEP BY STEP GUIDE
** Note - Pre-Start Requirement** - Later on in the AutoRequest Setup you will be selecting a form you have already setup, so be sure you have done that first HERE.
1. Add Settings - From the main menu find AutoRequests in the Collect section. Click here to open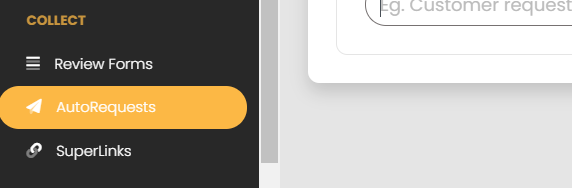
Begin by selecting the "Setup" button to open the settings menu.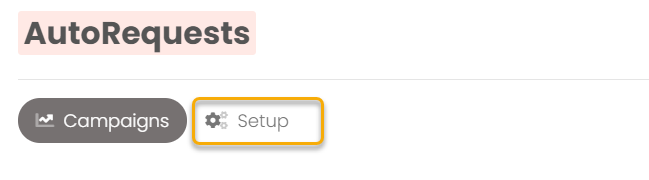
-
Contact Settings - The Contact Settings allow you to set the timing for when you request a testimonial from each contact by setting the frequency to once a month, once every 3 months, once every 6 months, or once every year. Most will set this as once a year. This means that once a contact leaves a campaign, they won't be contacted within another campaign for at least 365 days. You of course can manually adding them to a campaign and if you do, this setting will be overridden at that point.

-
Property Settings - Enter the Sender (From) name and email address (Reply-to address) you want for your emails.

-
Custom Email - You have the ability to send from your own domain vs the standard send address. To set this up, click the "Use a custom email address" checkbox, add your email, and click the save and verify address button.
 You will be sent an email to the designated email from Amazon Web Services with the subject "Email Address Verification Request in region US East (N. Virginia)". Please click the link in that email to verify your address for sending. While not required, in order to ensure the best deliverability, we also recommend you setup the DKIM/SPF records in your domain DNS settings.
  You will be provided with 3 CNAME and 1 txt record to add to your DNS settings. You can click the easy copy button for each item. Setup for these items are included in the script install service if that was purchased. You can also purchase separately if required HERE. Once your DNS records have been updated you can click refresh to see the current verification status. Once updated the items will show green as active.

2. Configure your campaigns
-
Add New Campaign - From the main Auto Requests page click the "Campaigns" button and then click "+ Add Campaign" on the far right.

-
Choose Your Objective - For now the only Objective Option is for Collecting business testimonials or reviews. These are campaigns designed to collect business testimonials within DirectoryTestimonial or reviews on external platforms such as Google, Facebook and more. So for now just click the next button. Soon you will be able to have a new objective for Collecting product reviews. These will be campaigns and review forms designed specifically for e-commerce product reviews.

-
Add Campaign Name - This can be anything from a list you are using, a tag category, or sending month, whatever you want based on your campaign settings. Don't worry you can come back and edit this later, so feel free to be generic at first till you get a system setup.

-
Choose Request Type - You have three options for making your testimonial requests. You can select email, SMS or a combination of both.

-
Select Form and Tag Responses - Select a review form to send your contacts to. You will have a list from all of your forms, so pick one for this campaign. (You can View the form to verify in case you did not name them good enough to determine the right one.) You can also add tags to the responses from this campaign to differentiate or filter the testimonials later on. You can use Month, Group, Event, etc.

-
Set Your Sending Schedule - Unless you are a fireman, no one like random alarm bells in the middle of the night, so we allow fine tuning your email and SMS messaging time lines. We allow you to pick:
- During Office Hours
- Daytimes including weekends
- Anytime or
- A Custom Schedule
If you Choose a custom schedule you will be able to select a per day time schedule when you want the requests to go out. And of course, this all would all be lost if we assumed you were on the East Coast of the US so we allow you to pick your time zone to make the times applicable to you. Or by narrowing the time lines you can make it applicable to multiple zones.

-
Add Campaign Contacts - DirectoryTesimonial allows you to an almost limitless fine tuning of your contacts to send a campaign to. You can add AND as well as OR prameters to filter out your contacts to send the campaign. The system will dynamically let you know how many will enter the campaign. You can see an example below that looks for contacts that have the name of Ryan that have been with you more than 30 days or anyone who have not left a comment in the last year. You can see there are 0 in my list who meet that filter set so will want to choose alternate options. If you do not add any rules it will automatically add everyone in your contact list.

-
Select a message sequence template - While you can certainly add your own content from scratch, we also provide a complete set of message and SMS templates for some of the most common testimonials needs including
- General Testimonials
- General Reviews
- Guided Testimonials
- Local Business Reviews
- Local Tradesperson Reviews
- Restaurant Reviews
- And more Coming Soon
 You can preview each series and of course modify the templates once selected for the campaign. Select "Choose Campaign" button for your desired option.

-
Edit Messages - After selecting the desired message chain, the messages will be populated which will then allow you to edit, duplicate, remove or add additional messages.

-
Add Follow-ups - Soon you can set automated messages that can be triggered once a testimonial is received. Example use cases:
- Sending a thank you message to customers.
- Asking customers to share their review to external platforms (Google, Facebook etc), based on your review form settings.
- Sending a reward to customers for their review (independent of their rating).
-
Save and Go Live - Once you are all set or ready to save your work, click Save or Go Live.

-
Status Check- Status Can be checked back on the main AutoRequest page. Any Campaigns saved but not live will say draft. If they are active it will say live. To Go Live or pause campaigns, simply click the campaign name and edit the status at the bottom of the page.
