What are the steps for setting up the Google API for DirectoryImport?
Step 1a. Initial setup of your Google Maps API Key
This integration uses the Google Key setup at the website settings. If the Google Maps API key has not been setup, please follow these steps:
Brilliant Directories Guide 10. How to Enable Maps with Google Maps API
If you are setting up for the first time, Google has a new option to setup the HTTP referrers right way. If you see this popup, select "maybe later" to not setup the restrictions as you will remove it later anyway.

You will also need to skip item 7 if the BD checklist as the API dynamic loading requires the key to be unrestricted.
If your key has already been setup you will need to make some adjustments to ensure this plugin works properly. If you see this popup warning in the Import tool, that is probably the issue:
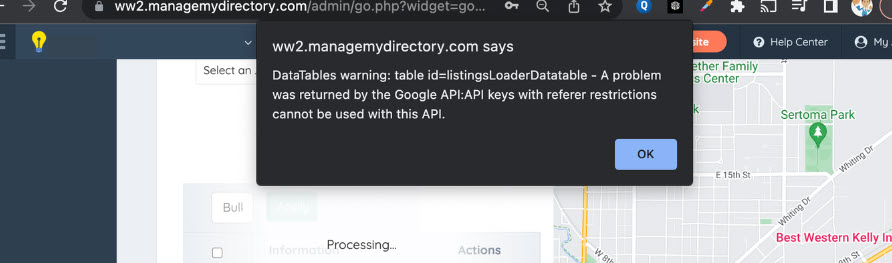
Continue to step 1b below, otherwise continue to Step 2.
Step 1b. Google API Adjusted Setup - Remove HTTP Referrers
The API dynamic loading for Google requires the key to be unrestricted. If you have already installed your Maps API key, you will need to make the following adjustments:
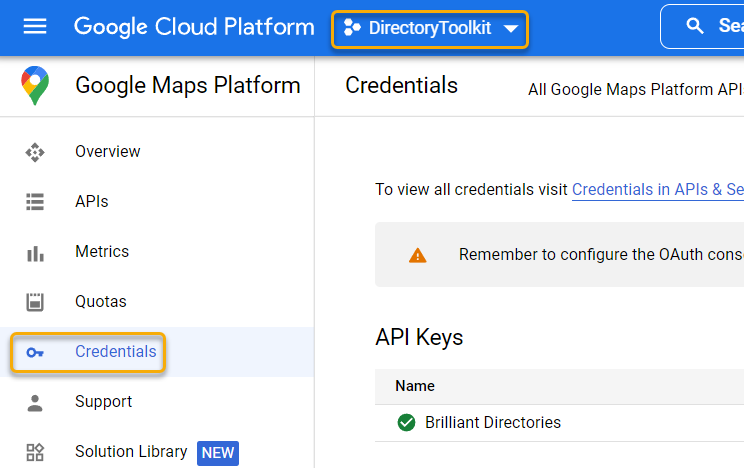
Login to your Google cloud Maps API here: https://console.cloud.google.com/google/maps-apis/credentials
Ensure you have the credentials for the appropriate website. Use the dropdown to select the appropriate property.
In the main screen either click the API key used for your Brilliant Directories site or click Edit KEy" from the three dot drop down menu. Keep in mind the API key will not be called the same as you see on screen. The API Key could be named anything depending on what you originally added in for the title. If you have multiple and are unsure of which on is the correct one. View the key and compare it to the one in your Brilliant Directories site under Settings > General Settings> Integrations tab.
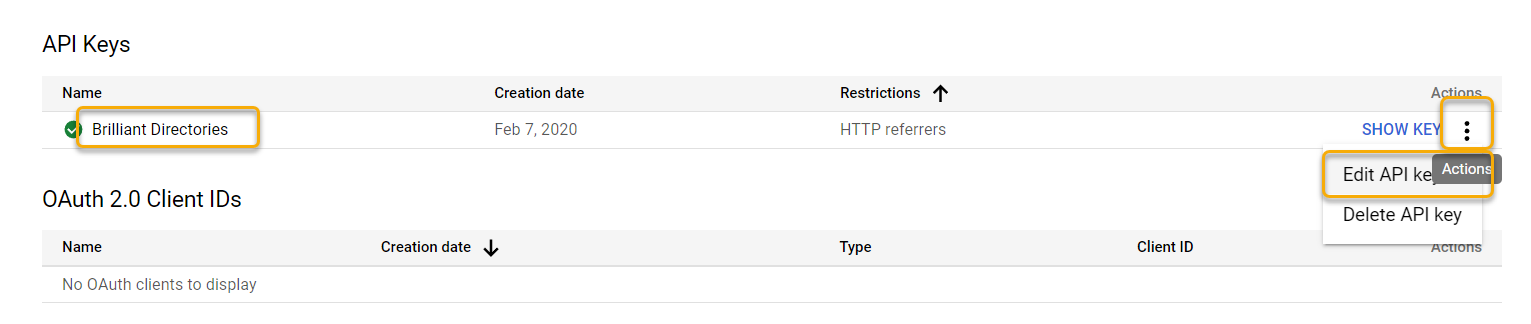
The Edit API screen will now appear.
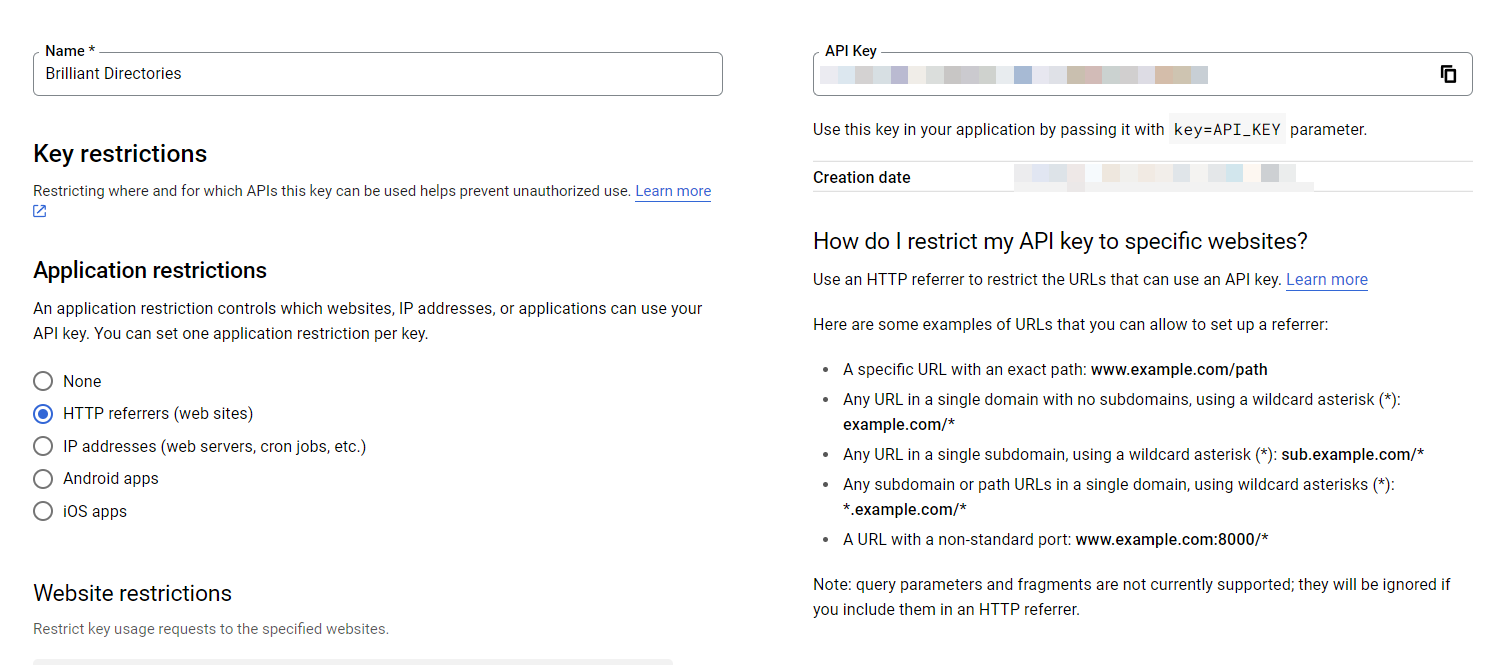
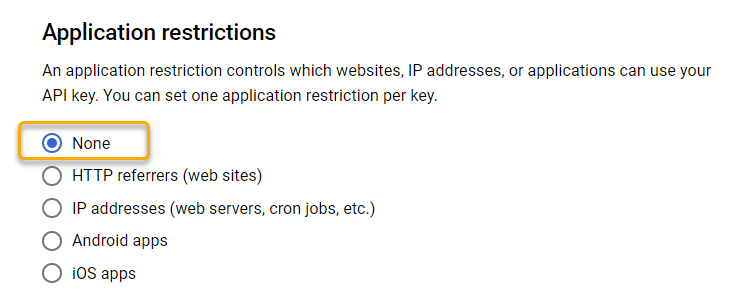
In the application restrictions section, change the API restrictions to none then scroll down and hit save.
Step 2. Ensure Billing is Setup for Google
If you already have the Google Key setup, follow these steps to ensure billing is setup in your project:
When you create a new project, you're prompted to choose which of your Cloud Billing accounts you want to link to the project. If you have only one Cloud Billing account, that account is automatically linked to your project.
If you don't have a Cloud Billing account, you must create one and enable billing for your project before you can use many Google Cloud features. To create a new Cloud Billing account and enable billing for your project, follow the instructions in Create a new Cloud Billing account.
Even if you have an account already setup be sure to check your billing information to ensure the credit card is not expired or about to expire.
Browse to your billing section with the following link. https://console.cloud.google.com/billing
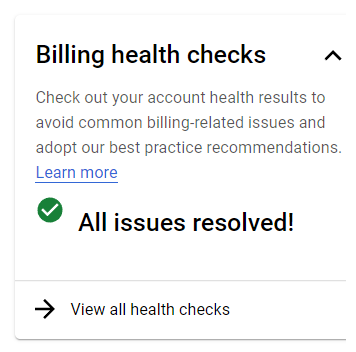
In the Billing Account Overview Section that should appear, make sure you billing health is all green of fix any potential issues Google is flagging.
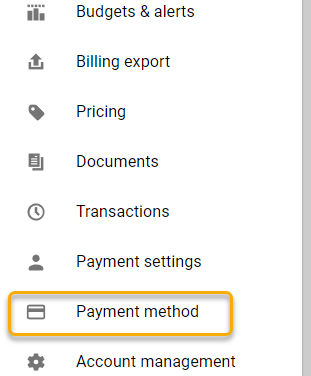
Next, in the left hand billing menu, select "Payment Method" to open the billing screen.
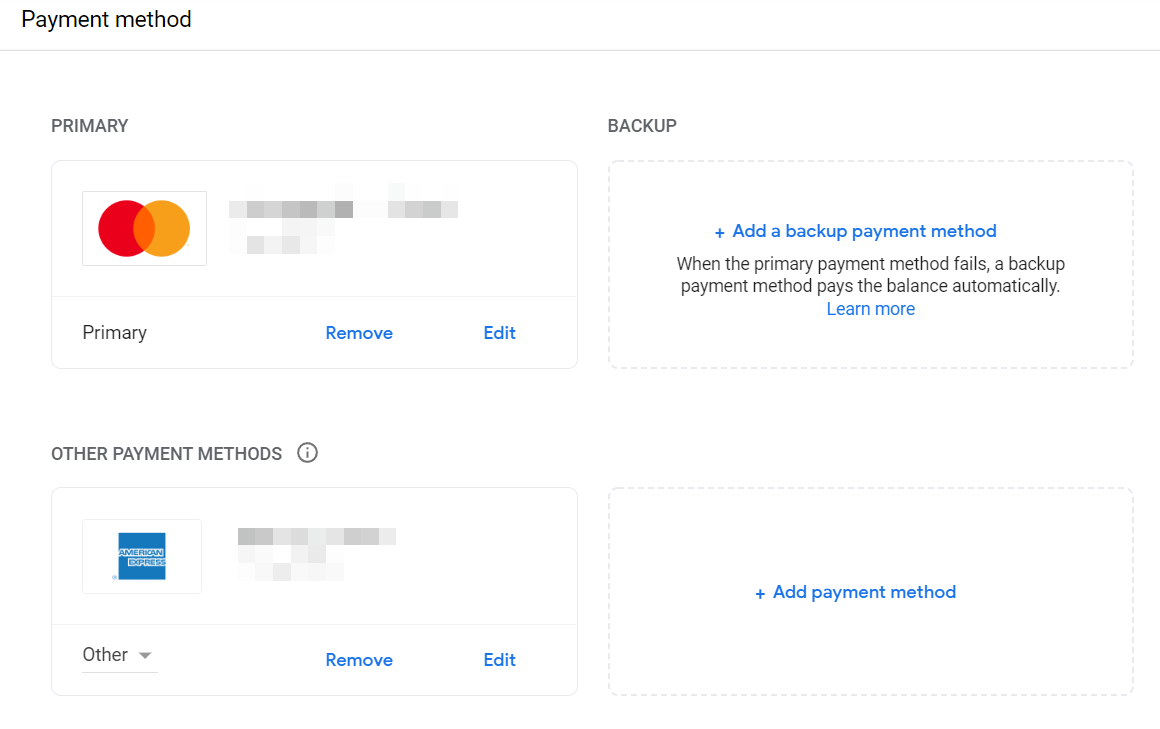
Ensure that you have a billing card in place and is not showing any errors, is current, and is not ready to expire.
Your Google account should now be ready!